
Visual Studio Code (VS Code) is a popular code editor that offers a wide range of extensions to enhance its functionality. However, having too many extensions installed can increase the startup time of the editor, which can be very annoying. In this blog post, we’ll explore how to optimize the startup time of VS Code by using profiles, a feature introduced in VS Code earlier this year.
What are VS Code Profiles?#
In Visual Studio Code (VS Code), profiles are a feature that allows users to create sets of customizations for the editor. VS Code has a vast array of settings, thousands of extensions, and numerous ways to adjust the user interface layout in order to personalize the editor according to the user’s preferences. With VS Code Profiles, users can create and save different sets of customizations, and then quickly switch between them as needed. Additionally, users can share their profiles with others, making it easier to collaborate with a consistent development environment
Why Use Profiles?#
VS Code Profiles can be used for various purposes, including the following:
Optimizing Multiple Work Scenarios: Users juggling diverse projects ranging from work assignments to personal open-source contributions and side gigs can leverage VS Code Profiles. These profiles permit the creation and swapping of distinct configurations, each tailored to meet the unique requirements of different tasks.
Facilitating Collaborative Coding: Profiles can standardize the coding environment across a team, mitigating configuration discrepancies and ensuring everyone works with the same set of tools.
Streamlining Training and Onboarding: Organizations can expedite the setup process for new hires or trainees by creating VS Code Profiles equipped with the requisite tools and configurations.
Managing Visual Preferences: For users fond of alternating between themes or appearances based on tasks or time, profiles can ease this transition.
Tailoring Language-Specific Environments: Developers dealing with multiple programming languages can create a profile for each, complete with relevant extensions, linters, and settings, promoting a more fluid workflow.
Supporting Learning of New Technologies: When embarking on learning a new technology or language, users can set up a separate profile equipped with all necessary tools and configurations, thereby fostering a more focused learning environment.
Enriching Educational Experiences: Profiles allow educators to craft VS Code setups, replete with specific extensions and settings suitable for particular classes such as computer science. Students can then access these custom setups, aiding in a more effective learning process.
Overall, VS Code Profiles provide a convenient way to manage and switch between different sets of customizations, ensuring that users have the optimal development environment for their current task or project.
Tips for Organizing Profiles#
Keep a “Default” Profile: You may want to have a “default” profile with commonly used extensions that you find useful across all projects. This profile can serve as your go-to for general development tasks. Mine has my common font and color settings, as well as extensions like Dev Containers, Live Share, and GitHub Copilot.
Name Profiles Descriptively: Choose descriptive names for your profiles to make it easier to remember what each profile is intended for. For example, “Web Dev,” “Python,” or “Markdown Editing.”
Create Task-Specific Profiles: Consider creating profiles for specific tasks, such as web development, Python development, or Markdown editing. Include only the extensions relevant to each task in their respective profiles.
| Profile | Extensions and Settings |
|---|---|
| .NET Development | C# Extension, NuGet Package Manager GUI, REST Client |
| Azure Development | Azure Extensions, AZ CLI, Azure Terraform, ARM Visualizer |
| Python Development | Python Extension, Pylance, Jupyter, Azure Functions |
| Markdown Editing | Markdown All in One, Markdown Preview Enhanced, Markdownlint |
How to Create and Use Profiles#
To create a new profile in VS Code, you can use two different methods.
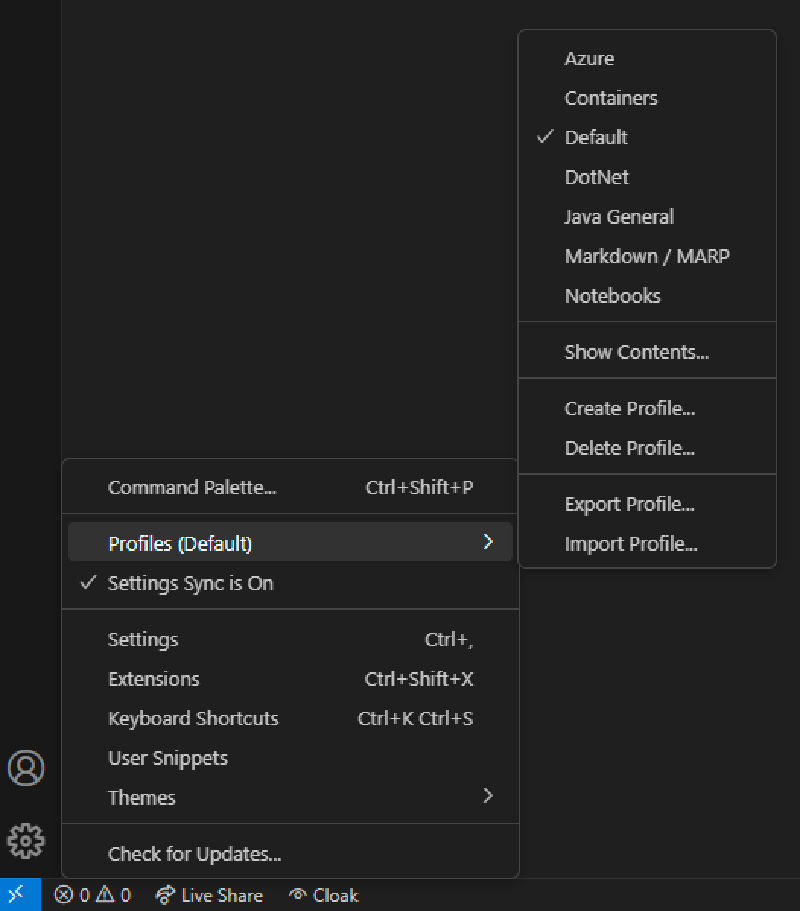
Via the Settings Menu you can create, delete, export, and import profiles
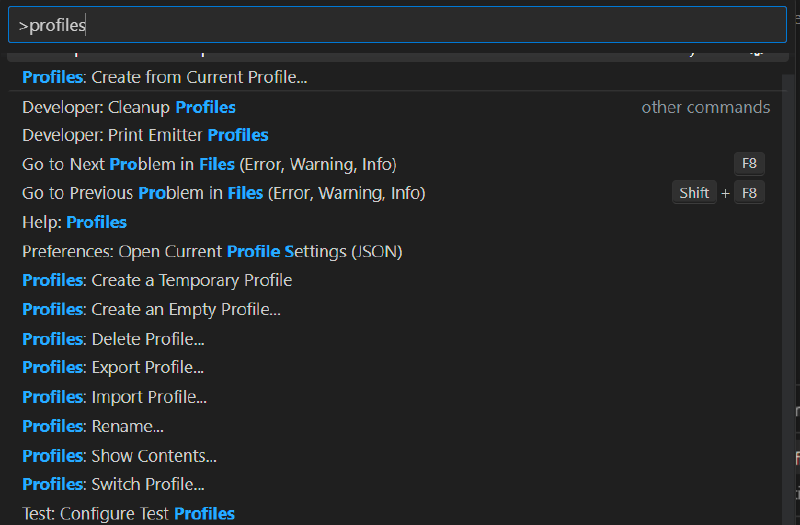
Via the Command Palette, follow these steps:
- Open the Command Palette (
Ctrl+Shift+PorCmd+Shift+Pon macOS) and search for the “Profile:” command. - You can create, delete, export, and more from here.
To switch between profiles, use the “Profile: Switch Profile” command from the Manage menu or Command Palette and select the desired profile. This will activate the selected profile and reload the editor with the specified extensions and settings.
Suggestions#
In my experience, creating a profile from scratch tends to reset various elements such as themes, custom fonts, and other personalized settings. As a workaround, I typically maintain my Default profile with my preferred configurations. When I need a new profile, I simply clone the Default one and then tailor it to my specific needs.
Conclusion#
By using profiles in VS Code, you can optimize the startup time of your editor and ensure that only the necessary extensions are activated for each project or task. This not only improves performance but also helps you stay organized and focused on the task at hand. Give profiles a try, and experience a more streamlined coding environment!